Rella's Table View
Last updated: June 4, 2026
Manage Your Content with Table View
For content teams and social media managers who prefer a spreadsheet-style, row-and-column workspace, Rella's Table view provides a highly structured dashboard. Under Table, you can search, sort, group, and perform bulk actions across your scheduled posts, tasks, and notes with ease.
About Table View
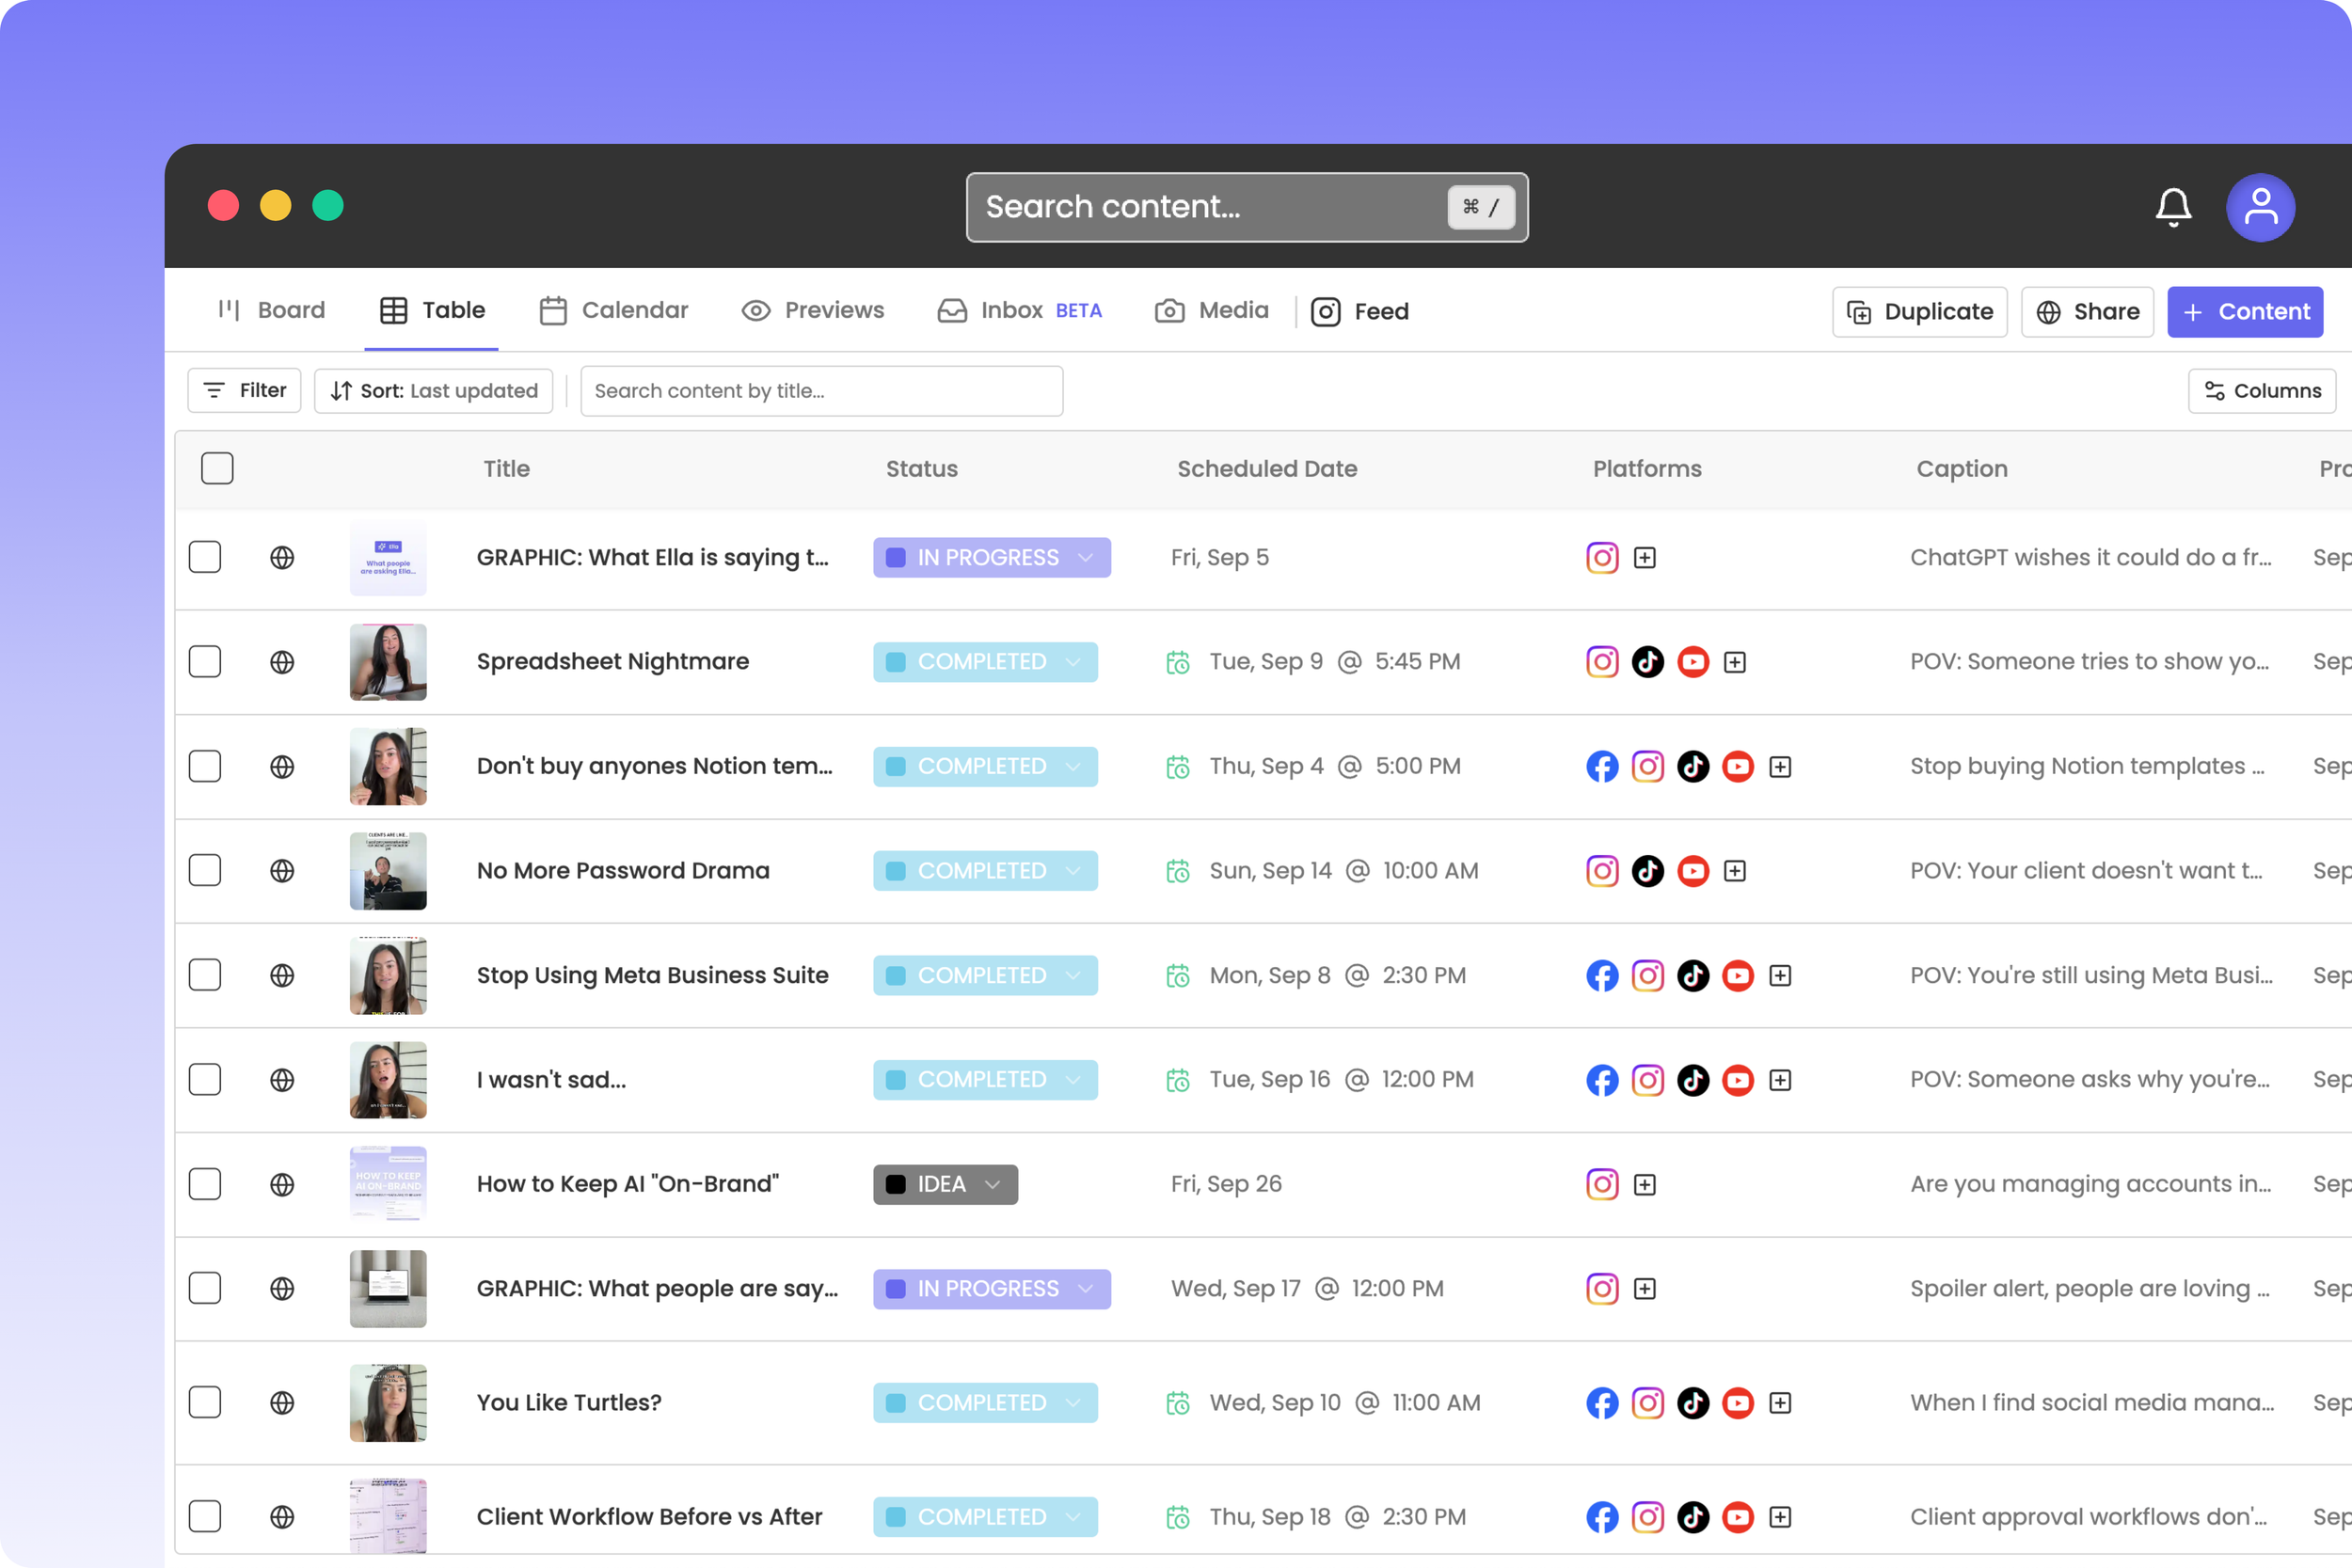
The Table view presents all of your Social Space events in a dense spreadsheet layout. It is perfect for reviewing long-term editorial schedules, checking task delegations, or executing bulk updates (such as approving multiple posts or moving draft cards to a project folder) in seconds.
How to Customize Your Table View
Rella lets you tailor your Table layout so you only see the data columns that matter to your active workflow.
1. Hide or Show Columns
Navigate to Table in the left navigation sidebar.
Click Columns (or the column visibility options button) in the table toolbar.
Uncheck any columns you want to hide (such as Tags, Assignees, or Projects) and check the columns you want to display.
Rella automatically saves your column visibility preferences in the database so your custom layout remains stable when you log back in.
2. Group Your Rows (Group By)
To organize your rows into clean, collapsible sections based on common attributes:
Click Group by (the group icon) in the table toolbar.
Select the attribute you want to group your content by (such as Status, Platform, or Project).
Rella will instantly nest your rows under collapsible headers.
Click Clear grouping inside the dropdown menu at any time to return to a flat row list.
3. Sort Your Content
Click any column header (such as Scheduled Time or Title) to instantly sort your rows in ascending or descending order. Rella saves your active sort preferences in the database.
How to Execute Bulk Actions (Multi-Select)
Instead of opening every post editor individually to apply repetitive updates, you can use the multi-select toolbar to batch-edit your posts and tasks.
Steps
Open your Table view.
Hover over the left-most edge of any row and check the checkbox to select it.
Select as many rows as needed. A floating Multi-Select Menu bar will appear at the bottom of your screen.
Choose your bulk action:
Change Status: Click Status to move all selected posts to a new status category (such as setting 5 drafts to "Approved" at once).
Add to Project: Click Project to group all selected posts under a specific campaign folder.
Archive: Click Archive to hide the selected posts from active calendars while preserving their history in your database.
Delete: Click Delete (represented by the trash icon) to permanently delete the selected items.
Table View FAQs
Can I edit post details directly from the Table row?
Yes. Clicking any cell inside a row (such as the caption cell or scheduled time cell) lets you update details instantly, or you can double-click the row to open the full Content editor.
Can I view standalone Tasks in the Table?
Yes. Rella's Table view lists all items inside your Social Space. You can use the main filters at the top of your dashboard to display both Content (posts) and standalone Tasks in the same grid.
If I group my Table by Project, can I drag posts between groups?
No. To move a post to a different Project in Table view, click the project cell on that post's row and select a new folder from the dropdown menu, or select the post and use the bulk Project action in the multi-select menu.