Organize Your Media in Rella's Media Library
Last updated: June 3, 2026
Organize Your Media in Rella's Media Library
Centralizing your creative assets makes drafting, scheduling, and collaborating on posts much smoother. Rella's Media Library (or Media dashboard) provides a structured environment to store, organize, and edit your brand's photos, videos, and PDFs.
1. Navigating Your Media Library
To open your library, select Media from the left navigation sidebar of your active Social Space.
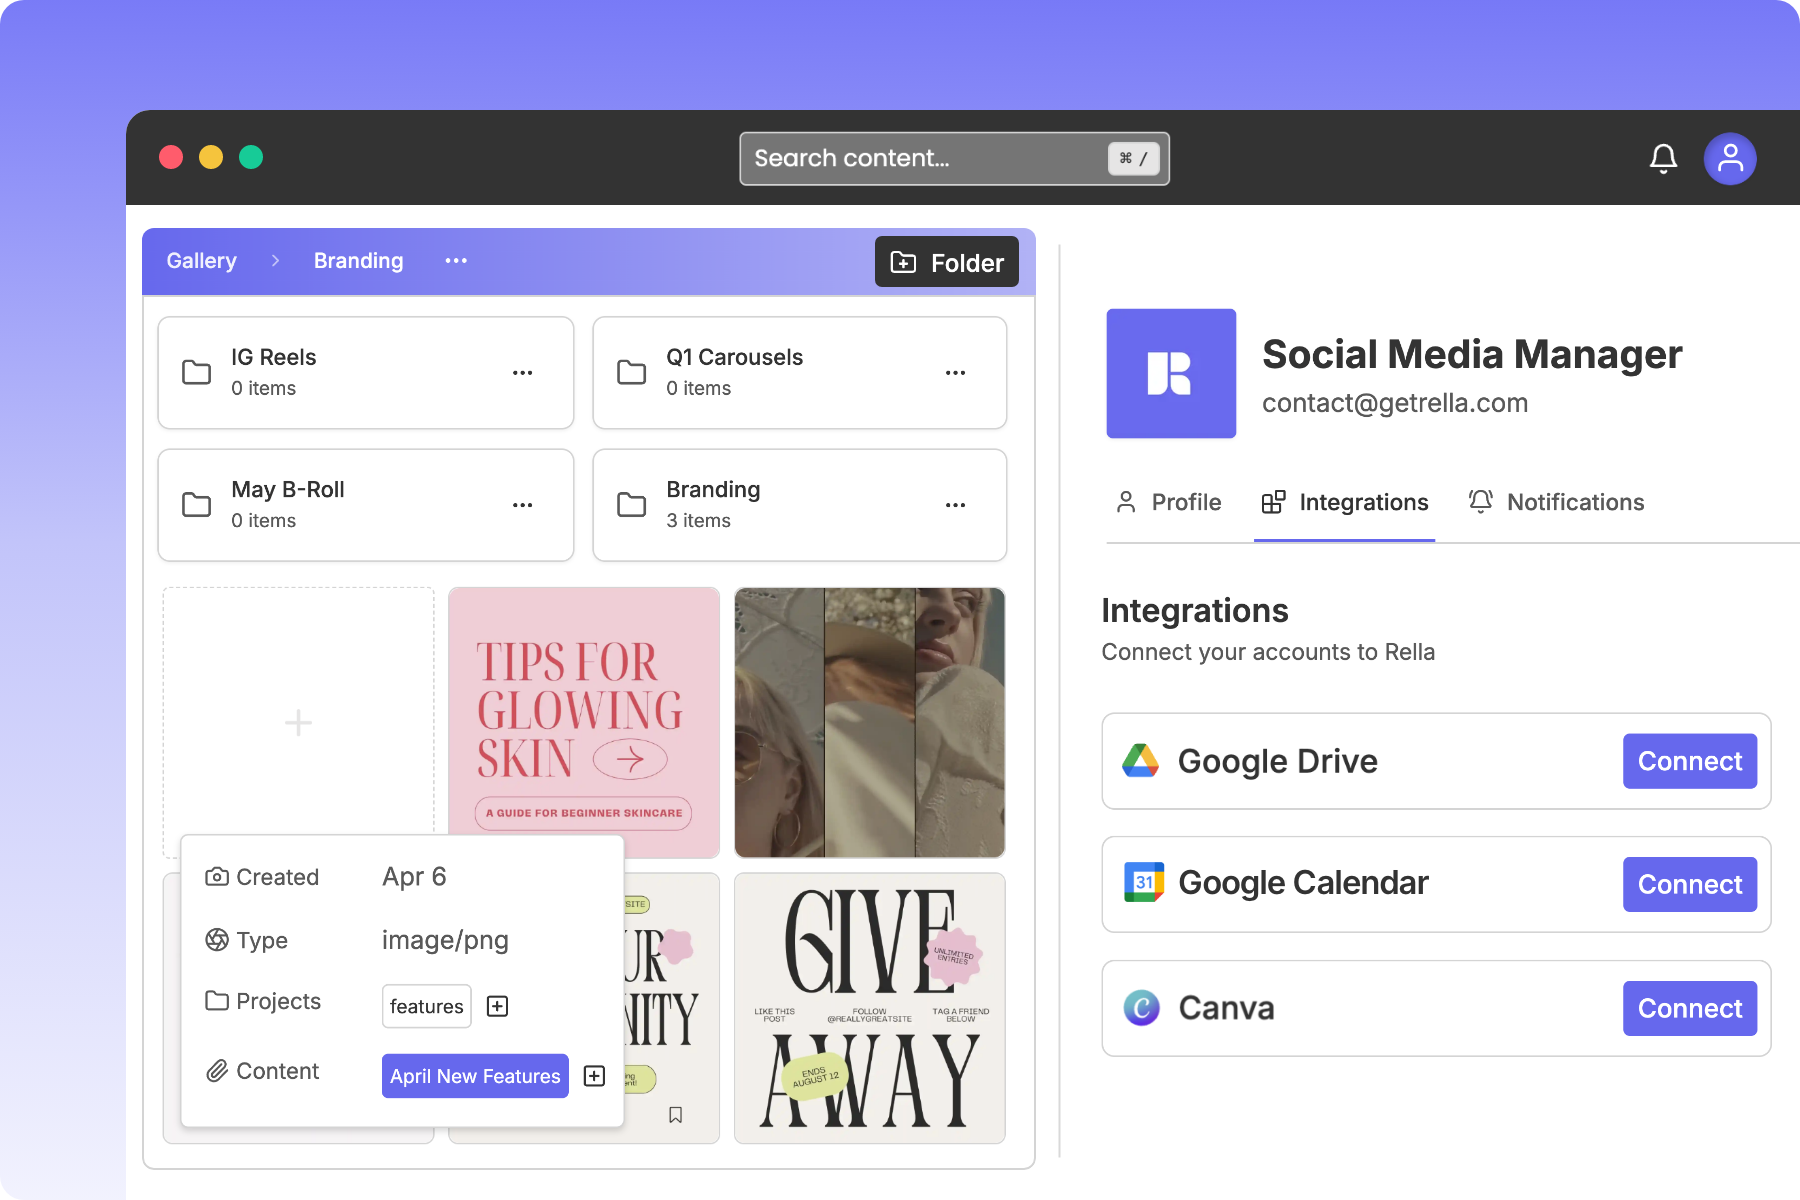
Your library is partitioned into folders and files unique to that space, ensuring your client assets and brand folders remain completely isolated and secure.
2. Creating & Managing Folders
You can structure your Media Library with descriptive folders to separate campaigns, asset types, or creative quarters.
How to Create a Folder
Open your Media dashboard.
Click New Folder (or click the folder icon with a plus sign)
In the dialog box, type your custom folder name (such as
"Q2 Product Photos"or"Summer Promo Videos")Click Add Folder [21].
Tip: If you are already browsing inside an existing folder, Rella will create a sub-folder inside that parent directory.
Drag-and-Drop Organization
Move files: Click and hold any image or video thumbnail, then drag and drop it directly onto any folder card to move it inside.
Navigation breadcrumbs: As you dive into subfolders, click the folder paths listed in the Folder Breadcrumbs header at the top of your workspace to navigate back to parent directories.
3. Importing Assets from Canva and Google Drive
To keep you from downloading and re-uploading massive design and video files, Rella integrates directly with Canva and Google Drive.
Canva Integration
Link your Canva account to import your finished graphics directly:
Inside the Media Library, click Import and select Canva.
Follow the secure authorization prompts to link your Canva account.
Browse your Canva designs directly inside Rella's popup browser.
Select the design you want to publish, select your preferred Export Quality (such as standard social or high-resolution streaming), and click Import to save it directly to your Rella folder.
Google Drive Integration
Link Google Drive to import folder structures or individual creative assets:
Click Import and select Google Drive.
Search through your folders using Rella's integrated Drive file browser.
Select the file, photo, or video you need and click Import to copy it directly into your Social Space library.
4. Editing and Cropping Media
You can fine-tune your uploaded assets directly inside Rella before adding them to your schedule.
Double-click any photo or video file inside your Media Library to open the file details and editing view:
Cropping & Aspect Ratios: Click Edit (the crop icon) to adjust image aspect ratios. You can select standard platform presets (like 9:16 for Reels and TikToks or 1:1 for Instagram Squares).
Auto-Zoom & Auto-Crop: For fast adjustments, use Auto-Zoom to automatically center and crop your asset to fit your targeted social layout perfectly.
Media Library FAQs
Can I share a single media folder with an external client?
Yes. On Rella's Premium and Premium Plus plans, you can share custom folders with clients. Open your Space Settings, click Share, and configure your client access permissions. Your client will be able to view and download assets inside that specific folder without accessing your wider library.
Will files in the Media Library be published automatically?
No. Uploading files to the Media Library simply stores them in your database. To publish or schedule an asset, you must attach it to a Content post as a Primary Media file inside the Content editor.
Can I rename uploaded files?
Yes. Click the three dots More Options (...) next to any media thumbnail, select Rename, type your custom file name, and click Save.
Can I reference media in the Activity panel?
Yes, you can mention images and timestamps in comments!
My public view can’t upload content

Before sharing a project, please create a media folder within the project to allow public viewers to upload content.